Exam Room Wallboard
A touchscreen on the exam room wall that doctors use to explain a diagnosis. I was brought in to add the two features doctors asked for most: showing patients photos of their own skin, and their own X-rays and scans.
Work from 2015–2016. Diagrams redrawn in 2026. See the originalsThe Wallboard was free. Sponsors needed proof that doctors used it.
ContextMedia Health put Wallboards in U.S. doctors’ offices in 2015, paid for by pharmaceutical sponsors whose messages ran on them. Sponsors wanted evidence that doctors kept using the screen. So the goal was to make it more valuable in the room, so it would get used more and seen more.
Only the doctor touches the Wallboard. The patient watches, listens and asks questions. Every screen had to work for the expert driving it and for the person in the gown trying to understand.
Two features, both about the patient’s own body.
Six months, from the current product to an encore.
Before designing screens, I compared the whole workflow for each camera.
A camera could plug into the Wallboard, connect to it, or work on its own and hand over a memory card. I mapped every step for each option to see where the doctor’s time and attention would go. Then I worked out the webcam and tethered camera flows in detail.
The hardware and regulations allowed one way in: USB.
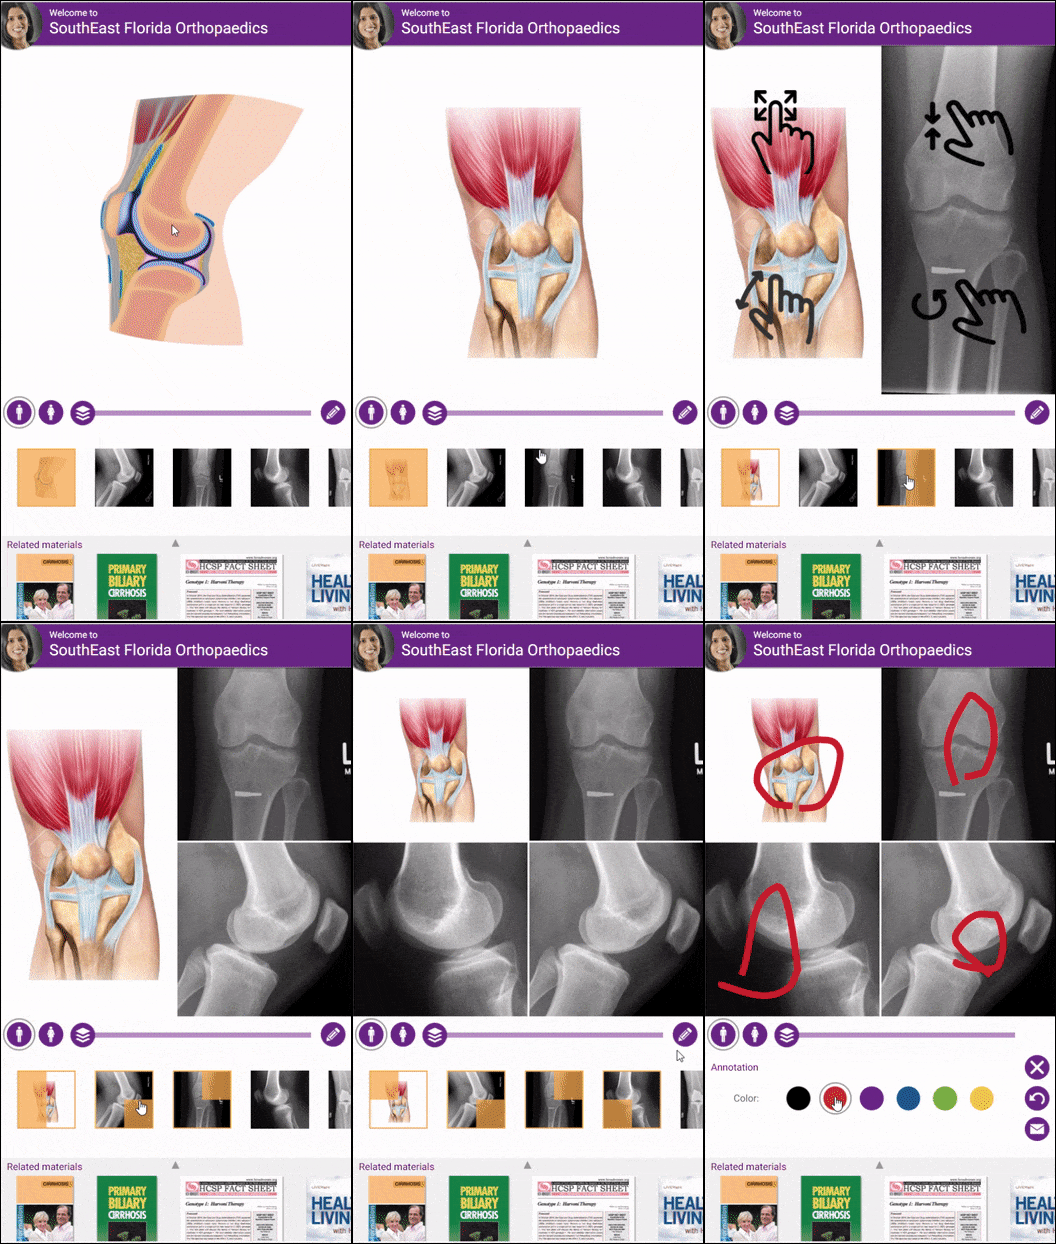
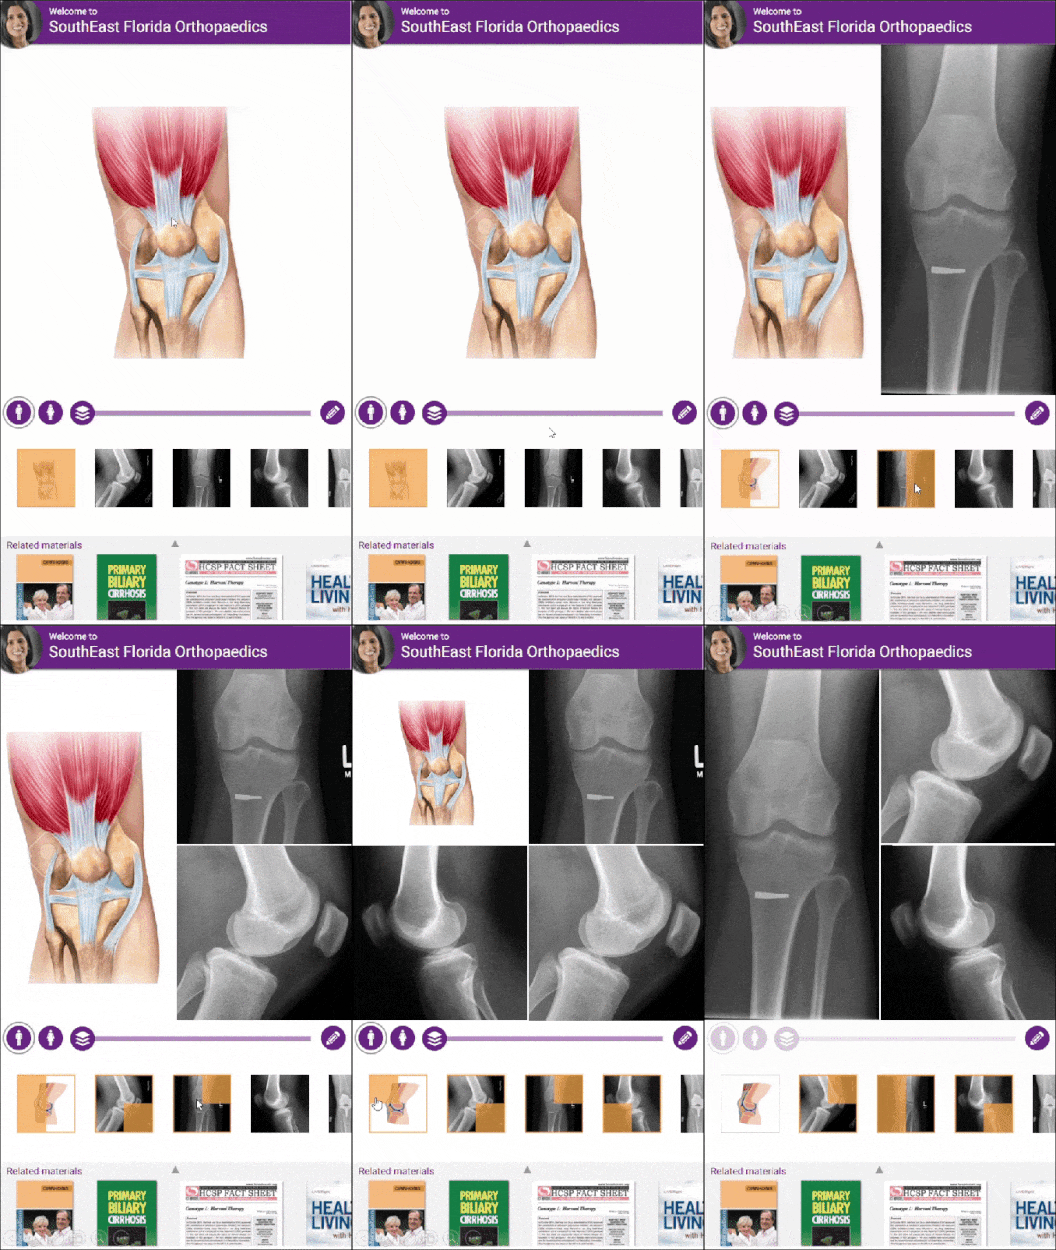
So the import followed what people already knew from consumer media devices: plug in a drive and pick your images. Imported scans waited in an image roll on the model screen, ready to pin over the anatomy and size, place, zoom or rotate.
Let the screen do the layout.
The touchscreen couldn’t do drag and drop, so showing several scans at once needed another way in. I designed two: a manual one where the doctor picks a layout and fills each tile, and an automatic one where each tapped scan simply gets a place on screen. The team chose automatic: one tap per scan, and nothing to plan in the middle of a conversation.
Physicians liked it. Their notes took one more round.
I built an interactive Axure prototype where four imported scans go onto the knee model, plus an animation showing scans moving from the roll onto the screen. The product manager demoed both to consulting physicians one at a time. Reactions were very positive. Their notes on color, highlight styles and image sizes went into one more design cycle, and developers started an alpha on a small set of Wallboards.
Then they asked for four more.
After handoff, the VP of product and product manager asked me to define the approach, goals and risks for a new set of requirements, and then concept designs for each.
What I'd keep, and what I'd do differently.
- Comparing whole workflows before drawing a single screen.
- Designing for two people at one screen: the one who drives it and the one who has to understand it.
- Taking work off the user, as automatic layout did, when they are busy with something more important.
- Watch doctors use the prototype with real patients, instead of hearing back from demos.
- Measure use before and after launch, since more use was the whole point.
The real artifacts, as made at the time.
The diagrams above were redrawn in 2026. These are the originals: product photos, sketches, task flows, screen concepts, the prototypes physicians reviewed and the encore concepts. Select one to see it larger.